Shop Crayola

Saturday, October 20, 2018

How to Draw a Croqui

In todays post I'll be showing you how to Draw a croqui in 10 STEPS ✍When I was in college I had the privilege of sitting under a professor named Mori Green, and she was an expert in Fashion Illustration. She went to my dream school (The Fashion Institute of Technology in NY), and got her Masters Degree in Fashion. By the time I had met her she had already illustrated for The W, as well as had her own fashion line which was self named. I was wondering why she decided to work at Bauder College and when I asked her answer was just gold, she said, "I made my living in the fashion industry, and now I want to teach young people to do the same and be even better than I was." Now I don't know about being better than Mrs. Green (Because she's awesome), but I know I can show others what she taught me. Unfortunately unlike FIT our Fashion Program didn't have a human anatomy class but I got the gist of it in a one on one session with her. It just so happened one of the other seniors just continued to be a no show and we were the only 2 there at the time who needed the class so we could graduate. Why home girl didn't show so she can get her paper 路‍♀️I don't know? I'm happy she didn't though because after lots of struggling in Fashion illustration 1 and 2, I finally got somewhere in the 3rd course. I was new to drawing croquis but I was not new to drawing, But I'd like to say that even if you are not the best that you can still make this work using what you know. If you are there type to look at something and draw it, you can use that to your advantage by looking at yourself or a picture of a model in a magazine and try your best to use some of the standard measurements to imitate the pose somewhat.

Here is a list of Materials you'll need:
Pencil✏️
Eraser
Paper
12" Ruler 
Now lets get Ready to SKETCH!

Step 1: Draw a 10" Line Down your Paper and mark each inch from 0-10" This is going to be your guideline to draw your 10 inch croqui.

Step 2: Draw the Head. The head is an egg 讀shape, but from the 0 point at the top of your paper to the 1 inch point represents your face. Draw the top of the head above the 0 point so that you can make room for the hair or a hat. If you need a measurement make the top of the head at least a half inch above the 0 point.


Step 3: Draw the Neck. To Draw the neck draw lines that curve out slightly from the sides of the chin. From the chin to the collar bone is about a half inch  down.


Step 4: Draw the shoulders and arms. To draw the shoulders first create a guideline at the 1 1/2" point using your ruler. Standard says this line should be at least 1 1/2" wide, but I draw mine at least 2 inches so I can have drawing room. I drew my guideline slanted down at the left because my croqui is walking‍♀️. With time and practice you will understand how to make the body move with the use of these guidelines. Draw in your shoulders and your arms and don't draw in the hands yet ‍♀️


Step 5: Draw the Torso and the Waist. To draw the waist make another guideline  parallel to the shoulders at the 3rd point. My guideline is raised on the right side because my croqui is walking‍♀️, and when you walk the position of the hips change. Remember the deeper the slant the more accent you put on your croqui. After drawing your waist line go back to the tips of the shoulders and make lines indicating the ribs, and draw in the bust at the 2 1/2" point.


Step 6: Draw the Hips and the Crotch. Make another guideline at the 4 inch mark also parallel to the waist and shoulders, but this time make it straight. From the waist line draw two lines down to make the hips and stop at the hip line. Standard says your hips should be about 1 1/2" wide but I say bump standard and do whatever the heck you feel is best for you. From the 4 inch guideline where the hips end draw lines towards the 4 1/2" mark to create the crotch. It should look like an upside-down triangle. 


Step 7: Draw the hands. Remember when I told you not to draw in the hands? Here's why! Your finger tips should line up with your crotch point (Seriously they do in real life, see for yourself.) So first draw the thumb and then the rest of the hand as illustrated in the picture. It should look like a claw. 


Step 8: Legs and Knees. In order to make the thighs you have to understand where the knees are. The knees always end at the 7 inch mark, so draw a circle where the 7 inch mark is. My croqui is walking‍♀️ so one knee is higher than the other to create the illusion that one leg is behind the other. The other knee is raised to the 6 1/2" mark. Now from the hips draw in the legs making sure that the leg lines end at the sides of your knee circles. Since my croqui is walking you see the full leg on the left side


Step 9: Calves and Ankles. From the sides of the knee circles draw lines outward and going inward to create the ankles at the 9 inch point.


Step 10: The Feet. To draw the feet  begin at the 9 inch mark and draw a line down toward to the 10 inch mark. The very end point represents the big toe. Sketch another line from the outer ankles to create the form of the foot. If they don't look like duck feet then you may have done it wrong. I made the foot on the leg that is raised slightly higher because my croqui is walking, and one foot has to be behind the other. 


Now you're done! All you have to do now is create your style lines and outline it with a black marker (a dark marker). The purpose of the black marker is to make sure you can see it through another sheet of paper so that when you trace your clothes onto your croquis you will be able to see through the page. We were taught in school to use fine point sketching pens,and even a lightbox to trace our croquis. I use what I can though, and one time that was a desk lamp inside of an empty fish tank and BOOM there was my lightbox!

Here is the video for my tutorial which you can find on YouTube:


Well I hope you enjoyed reading my blog. Please watch the video as it relates to this blog and if you didn't understand exactly what I was saying maybe the video will come in handy for you. Please subscribe, share and comment!

Hey! Are you looking for more professional art supplies follow the links underneath the pictures to purchase!

Wednesday, August 15, 2018

I Grew Up on Crayola

A week ago my husband and I gathered up the kids and were out just running errands. He had been feeling under the weather so we stopped in Target to get some Robitussin CF. So we're walking down the aisle and I see the Art supply area. Of course I am automatically drawn to it, so I begin moving towards it, and my daughter follows me. She begins pointing at the random Crayola paints and markers and everything to show me, but unfortunately I wasn't paying attention because I wasn't there for back to school supplies (which Crayola had seemed to take over the entire aisle with), but I was there for a different product.

I saw the Prismacolor colored pencils and they were only $10 for 12, however they didn't have the double ended markers that I'm used to at that Target so I wasn't as eager to come back and spend money. Even though I didn't spend any money something caught my eye in there. It was a 24 count colored pencils set inside a Tin, and right beside it was a 16 count Markers set. Well the pencils were $19.99 and the markers were close in range to that. I was awestruck...Where have they been all my adult life?


So I call Crayola a few days later and I ask them about this in customer service. According to the rep that answered my call, Crayola started doing the more professional colored pencils and markers as well as the lettering set when the trend of "Adult Coloring" broke ground in 2015. In case you don't understand what adult coloring is let me tell you.

About 3 years ago I started to see these infomercials for adult coloring books. Every book had these complicated designs like a kaleidoscope and they came with a set of markers, crayons, pencils...etc, and of course they say "Just call now and you'll receive not one but 2!" You know the usual jargon they say so you can hurry and place an order. Anyway these started trending as a means to calm the nerves at first, because all the testimonials were about how the people went from being stressed to very calm in a matter of seconds. There is something in psychology that is called "mindfulness" and it's when you focus on one thing, to relax. Well...Crayola, Leisure Arts, and many other companies have now taken advantage by jumping on this bandwagon and now they've created what is now called "Adult Coloring" which I say is glorified scholastic coloring. Apparently this Adult Coloring thing is touching in so many places because it emphasizes coloring, Calligraphy, as well as some other professional arts. I have no problem coloring with my kids so it's funny that Crayola decided to do this because I have been using Crayola all my life. My mom is an educator and she swore by Crayola. Crayola knows they are the teachers most preferred brand and actually brag about this in their advertising. So now that they've gotten into the "Adult Coloring" trend, it seems to me that we have unfinished business.

Now they say that their colored pencils are used for blending which is actually impressive to me as a Fashion Illustrator.  I've had experience with other brands, and already I've tried one of the adult coloring brands outside of Crayola and it seems that they are not meant for layering and blending. These things are important in Fashion Illustration, especially when you are talking about clothes with patterns, coloring in skin, and all those things that are important in the rendering process.

Anyway I haven't tried any of these products, and I'd love to just to give it a review since I'm so familiar with Crayola. However if you'd like to purchase anything from Crayola they have an option for you to subscribe to their emails and in turn you receive a 10% off discount. With your subscription you do get some emails with coupons! I have already subscribed and when I get my hands on some cash I'm going to put my 10% discount into affect. So whether you are "Adult Coloring" or using for Scholastic reasons you can get your discount when you click on the link.


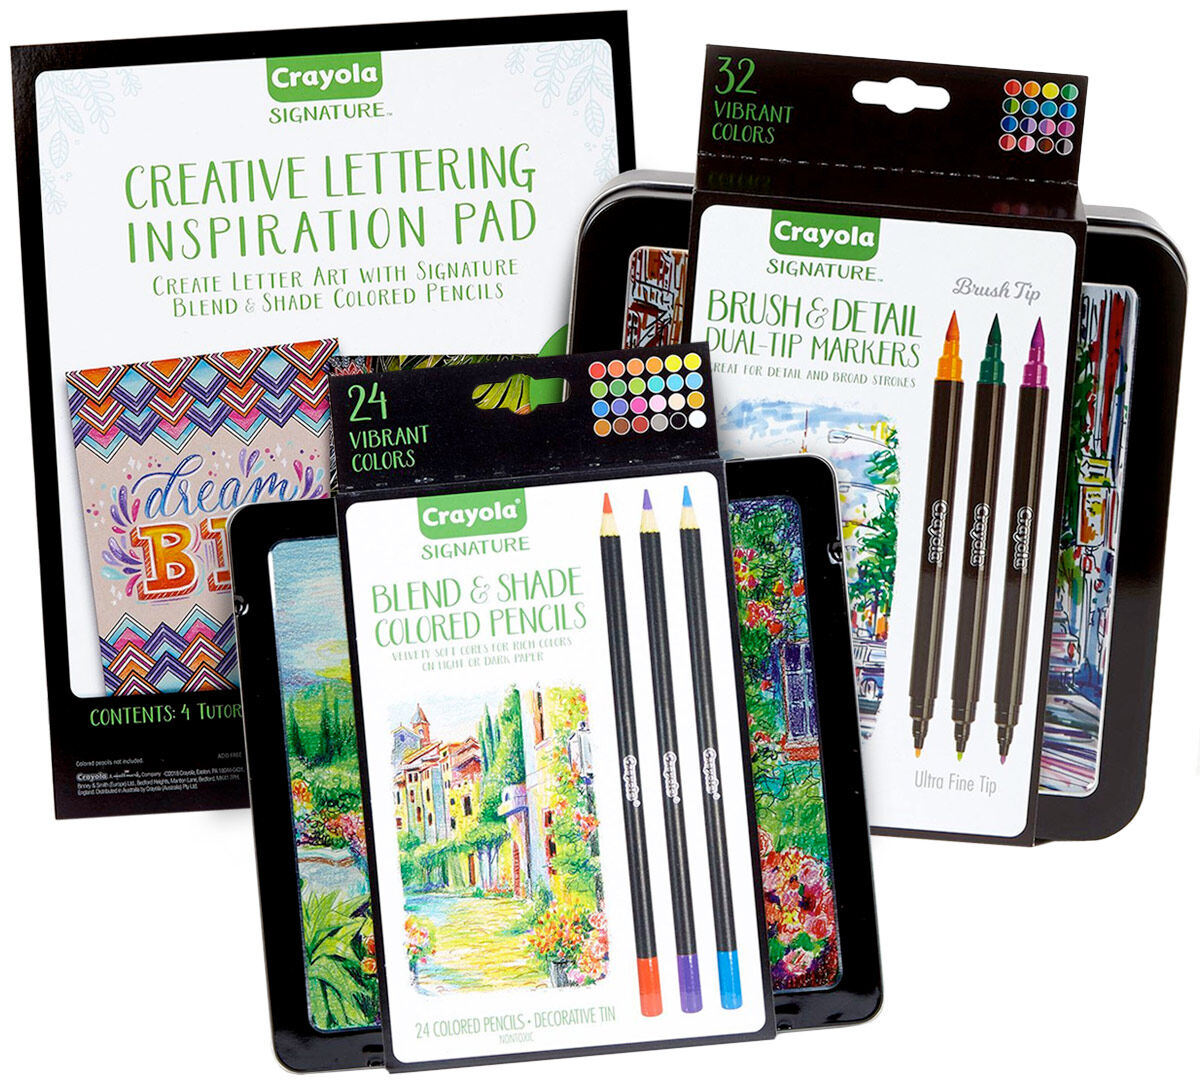
If you would like to purchase the Hand Lettering Tools and Tutorials Kit. It includes the Markers, Colored Pencils and The Creative Lettering Inspiration Pad. It also comes with some tutorials on how to do creative lettering (calligraphy). Just click the link below the picture. It's originally priced at $42.97, however with your 10% off discount, you only pay 38.67. They have free shipping on orders $50 and above so it may be smart to buy two just so you can avoid the shipping costs.


Hand Lettering Tools & Tutorials Kit


Hand Lettering Tools & Tutorials Kit

If you like this blog remember to subscribe and share. If you happen to order your kit or have an existing set. Please feel free to tell me about it in the comments.

Monday, July 16, 2018

Collections and Sketches

Hi! I know it's been a while and I've been busy! We just got settled into our apartment after 7 long months of trying to get on our feet. Don't get it twisted though, I've been very diligently working on my collection and some sketches.

Well...here is what actually happened. My nerves were in such a bad place that I ended up having to sketch for my sanity's sake. It seemed to be the only thing I could do to settle my nerves! I mean I know I'm not the only one who's ever done it in history. According to my art professor in college Piccaso actually painted an entire painting with a woman hurling dishes at his head. Art is a peaceful craft, but I don't know how peaceful I'd be with a dish flying at my head.

During this time I made it my business to create a more structured collection. I had created this collection back in February for Valentines Day, and I actually ended up in the hospital for some reason. So just this May I went to the library and I did a portion of my power point slide. Here is what I came up with:


I actually couldn't add music because I used a free limited version of Microsoft Power Point on my OneDrive account, and for the record it is very much a life saver. I mean it would be awesome to have the full version on my OneDrive account so that I can really create my collection as I desired but it was enough for the time. I recommend to any student in college a OneDrive Account. This way there will be no need to actually have a physical laptop of your own around, or even if you do have a laptop but just can't afford the software it is a really good investment to get a free account.

Now onto my sketches...I have way more that I've drawn since, including some rendering practice I've done, but here are some of my sketches and drawings that I practiced hard on. Now excuse the blurred colors in the footage because I was unable to use professional markers and colored pencils. I actually did these at the library with some crayola's, and as someone who's so adapted to using Prismacolor markers and colored pencils I actually see the difference. Trust me though, once my supply of art materials comes that I will be back to using what I'm more adapted to using. If you want to take a look at my work, here is a link to my work on instagram:

Video Sketches

If you like fashion illustration or any form of art, and need a new set of colored pencils follow the link to the colored pencils. Save 10% on orders that are $59 or more. Bruynzeel Design Colored Pencils and Sets

Thanks for reading my blog!

Wednesday, March 7, 2018

Kana Wear Jewelry Party! CONYERS!!!

Hello New Creatures! I'll be hosting a jewelry party in the Conyers area for anyone interested in buying custom jewelry! The Party will be held at 1620 Garden Court, Conyers GA 30012 on March 17th at 3pm.

Years ago when I was a teenage entrepreneur I used to not only do custom orders by taking placed orders I also used to participate in vending events where I made custom orders on the spot. So at this event I will be taking custom orders as well as creating them. You can also bring your own beads and old beaded jewelry for me to refurbish and make something new for you and I'll take 20% off your full or half set!

Here are some of the pictures of my half sets that I have already created. You can come get yours for just $12 (tax will be included at the time of purchase).


REFRESHMENTS will be served at this event, so you can sit back, and eat while your custom orders are being made. Or you can watch me create your custom jewelry set! Your support is greatly valued either way!

Speaking of support...my campaign is still a sure thing. I am taking donations for Kana Wear LLC on paypal, go fund me, and in person. If you would like to donate your monetary donation for this event, Please go to either paypal.me/kanawearllc or www.gofundme.com/kanawearcampaign to make your donations!


Donations do come in various forms and therefore if you would like to donate some beads and findings to Kana Wear LLC I'll also be accepting those in person at this event.

I am so excited about this. I'm hoping and praying the turn out is great. Please let me know if you will be able to come out and show your support. If you can share this blog post with someone else and just spread the word it would be greatly appreciated. 

Here are some photo's from an opportunity I had to showcase my work at Mt. Carmel Baptist church on Monday Night Ministry. Pastors Tim and Jackie are amazing for allowing me to do this after Bible Study. Their daughter was gifted with a cheetah print hair bow, and her mom bought her a green and red half set. It was wonderful! And if you know anything about me, you know that I get a rush of adrenaline when I'm in my element!


With all this being said I look forward to serving you and creating more jewelry for you. Yes I do make other things such as hair bows, bow ties and other cool things, and those things can be ordered at this event. So come and get Fabulous with me-the new creature way. I look forward to seeing you there! 

Monday, February 26, 2018

How to make a Hair Bow Tutorial

It has probably been a very long time since my last post, so I decided to do something EXTRA special this time, and it's taken me over a month to just have the nerve to post.

In this tutorial I teach how I make a hair bow. Now if it were up to me my daughter would have over a billion of these things in her bow box, but she's lost so many of my bows that I'm just going to secure her hair bows onto her head using a scrunchy instead of a barrette clip. I will show how to do that in another video someday.

To make a hair bow the first thing you need are the materials which include:

  • Ribbon
  • Needle and Thread
  • Barrette Clip 
  • Scissors


Step 1: Overlap the ribbon and cut where desired.


Step 2: Take the back of the ribbon and bring it to the center back of the overlap. Begin to stitch in an in and out motion (in almost a basting stitch) going upwards to scrunch the bow.


Step 3: Pull the thread through and wrap it around the center of the bow once and then put the needle right through the center of the bow to keep it secure. Repeat until you feel it is secure and tight in the bow shape, and now secure the back with a stitch. and cut the thread.


Step 4: Cut more of your ribbon about an inch and a half down. I measured visually when I cut this center piece! Then with the inch and a half ribbon fold it in half wrong sides together and fold it around the center of the bow to make a center piece for the bow.

Note: Make sure to fold down the edges of the ribbon to hide the part where you cut.


Step 5: Take the inside of your barrette clip out and put that part to the side. Make sure that you fold the edges of your center piece over the barrette clip and sew it down.


Step 6: Once you've sewn your center piece around the barrette clip you may notice that your barrette slides back and forth on the bar of the clip. To prevent this from happening sew through the holes on both sides of the clip and secure it to the ribbon so it won't move.

Step 7: After you've secured both sides of the bow to to the clip you put the center of the clip back inside of the clip where it belongs so that it can open and close and be functional. Fluff out your bow and now you have a hair bow!

Step 8(optional): For design purposes I decided to cut a triangular shape at the bottom of  the ribbon so that it can look a little more decorative. You don't have to do this step unless you want to.


I really enjoyed making this bow as I do with other bows. In the future I'll show you other variations that I do. In case you feel you've missed a step here is the video for the tutorial that I just wrote this article on! I don't know how many of these I'll be doing per month in the future. I'm trying to just go with the flow of everything. Please comment, share, and subscribe to my channel! Blessings!

Saturday, January 27, 2018

How to Write a One Page Business Plan

Lately I've been thinking about other simplified methods I used to run my business effectively. In my last post I discussed ways that I started my business for free or with little money, and I expressed how my simplified thinking saved me a lot. One thing I did not talk about is how my desperation lead me to the One Page Business Plan.

I was trying to reconstruct my business plan on Power Point about 4 years ago, and I pulled up a template that they had created already with all the necessary things in it. Honestly I didn't understand half of those terms and I had to research them anyway. When it became too difficult to understand I looked up simple ways to construct a business plan, and stumbled across a blog post on Entrepreneur Magazine about how to make a 1 page business plan and you can read about that here:


There were 2 methods listed and I used the one that was easier for me to comprehend. If you can't understand your own plan then how is it easy to tell others or even carry out the plan? Remember my objective was to simplify it so I can understand. I knew that I was just starting out so I didn't need to make it complicated or "too cooperate" as I'd said, because I wasn't at that level yet. 

Anyway I went onto take their advice and I created my own template on Microsoft Word. As I said in my previous post, I am very good with Microsoft Word, and Power Point so constructing a template wasn't hard for me to do at all. This way I designed it to my liking instead of pulling up different templates that I just didn't like. I also downloaded a copy of my plan into google docs so that I could edit it on the go. If you don't have google docs go download it now in the google play store because it is a life saver. I don't know how many homework assignments I edited on the go while I was in college and had no access to a computer. 

I will leave an attached document of my template at the bottom of this post for anyone trying to do their own. It is an outline for someone trying to figure out what to write, so feel free to delete all of the stuff I put in there and insert your own plan.Your business plan should consist of your company name, it's vision, the mission, objectives, strategies, and an action plan. 

Your Company Name should go at the top of the template of course and you can include the year if you'd like. I don't include a year on my business plan because I've come to realize that accomplishing certain goals are sometimes meant for later, or that you may take longer than expected to do something in your plan. There are even some plans I've scratched all together because I just changed my mind. If you feel like you're getting something out of putting a time frame on it then that's up to you.

The First part of your Plan would be your Vision. I honestly don't have any qualms about keeping the vision statement short or long, but what I don't advocate are vague or broad statements. Your vision is what you see for the business in the future after you've completed the year, or whatever time you chose to create a new plan. If your vision is to be the best online retailer on the face of the earth then that should be written as your vision. As I said, it can be short or long but the basic concept is that it can be understood when it's read.

The Mission is the part of your business plan that tells what your business is for. Everything is here for a purpose, and you most certainly had an intention in starting the business. Somewhere you saw a need for change and you felt like you could provide that change, so in this part of your plan your statement should include what problem you are solving by introducing your product to the client. How will they benefit from doing business with you? That's what your mission is. 

The third part of your plan are your Objectives. What are some things you must do for your business to grow and see success? Do you have to grow clientele? Do you have to get an LLC? What are your goals. You can list as many of your goals as you would like. Don't worry about being too simplified here because this is where you would start your alphabetized list. I recommend at least 3 so that you won't get swamped in a ton of objectives and make yourself confused. Here is how your business plan should be looking so far.

Company Name/Year:
A) Write your objective here.
B) Write your objective here.
C) Write your objective here.

The fourth part of your plan is the Strategy. Your strategy explains the how of your objectives. How will you accomplish each objective? What will you do to make sure that it gets done? If your first objective is to grow clientele your strategy should show your method of how you will do that. Are you going to advertise? Will you have a contest to draw attention to your product? How are you going to accomplish each goal? Usually for my strategy I use a Numbered list under each objective.

Company Name/Year:
A. This is your objective
1. This is your first strategy
2. This is your second strategy

The Action Plan is the part where we really get to the nitty gritty of things. This is not only your how but several different ideas you have for how you will go about your strategy. Using the example objective listed above to build clientele, and your first strategy being advertising, then your bullet underneath this should include every method you know on advertising such as online marketing, in person marketing, etc. Some people recommend putting a date on it but things are always subject to change. As long as you know for sure that you will do it, and it can be done in real time that's all that really matters. By the time that you are done with each bullet then your business plan should look like this:

Company Name/Year:
A. This is your objective
1. This is your first strategy
  • this is the first step of your action plan.
  • this is the second step of your action plan
I don't consider myself to be any type of expert, but I do hope that the information that I've provided can somehow help someone who is just starting out like I did. Editing your business plan on the go with Google Docs will actually benefit you because you just never know when that wave of inspiration will hit you. I generally like to update my business plan every year, but I say to pay your business plan a monthly visit. It will keep you aware of your progress, and help you to stay focused.

This year I reviewed my old business plan from 2017 and I noticed that I had actually done everything I'd planned except some of those things I just changed my mind about. I hadn't done my routine visit in several months and I had actually become really discouraged about my business. I was being so hard on myself until I noticed that my objectives didn't even state anything that I was upset about. All the things I was feeling discouraged about were things that I needed to add to my updated business plan for 2018 and that's exactly what I did. 

Here is the link for my version of the One Page Business plan. It includes a breakdown of everything so you can create one of your own, and design it to your liking. I hope it helps!!! Thanks for reading.

One Page Business Plan Outline: